Showing posts with label Cakes. Show all posts

Sunday, 10 June 2012

Quick, easy 3 or 4 ingredients choc pudding (in the microwave)

Took me a minute and 30 seconds to make this
decadent chocolate cake
Did I mention it is Gluten and Dairy Free too... And healthy???!!! Do not adjust your screen (or glasses) this is not a typo.

I came across this beauty when one night I made my son's pudding and got the time wrong on the microwave (must've been one of those nights).
Despite baking a lot I am not really resourceful when it comes to puddings for my little one. I just generally make him a chocolate porridge with pieces of dried fruitsor mashed banana. The purpose is mainly to get him full so we can all have a full night sleep. Did I mention he is a lazy eater?! This dessert works used to work fine for me. Now that he has tasted the 1 minute pudding, there is no going back.

So to the recipe (today also seems to be the ideal day to have one for afternoon tea since iti s cloudy and cold here)
For 1 person.

Spray a breakfast bowl with oil.

Ingredients:
-1/2 of oats (processed into flour)
- 2 tsps of baking cocoa (I have not tried with drinking cocoa powder but it should work, adjust the sugar they generally contain some as well as milk powder)
- 2 tsps of agave syrup (or honey)
- 3 Tblsps of soy milk approx

Mix all the dry ingredients. Add the milk and mix until it ressembles a thick cake batter. You may require some more milk.

Spray a breakfast bowl or ramekin (if you don't want yours to look flat and miserable like mine). Pour the mixture in the bowl and microwave for 1 minute. It generally only takes that long, however if you have put too much milk you might see that it is not completely cooked, so put it back in the microwave for another 30 seconds.

Enjoy it!!!! It tastes really decadent and give you an immediate chocolate fix.

Variations:
I made this for my little one last night except I added half a mashed banana and reduced the milk a little. It was very nice and almost the whole bowl was devoured.
I also made mine (pictured) with coconut milk instead of soy milk. It was delicious! It tasted rich and the coconut milk definitely brought the chocolate flavour out. I ate 3/4 of it and just finished the rest as I was typing this recipe and it taste very nice, very nice indeed.

Make this is a big bowl with a chocolate ganache or some cream on the side next time you have guests and let them think you have been sweating over a hot oven all day, they won't taste the difference.

Looking around for similar recipes after my first and I have found a very similar recipe om Chocolate Covered Katie if you wanted to try this one as well: http://chocolatecoveredkatie.com/2012/01/19/single-serving-mocha-chocolate-cake/ with a few more ingredients and a different variation on flavour.

Happy Baking everyone :)

Tuesday, 8 May 2012

Plate of little treats for dessert: Raw truffles (with chocolate), flourless oat cookies and mini GF donghnuts...

The content of this plate no longer exists. Nom, Nom, Nom!
Starting from the left of the plate, clockwise: flourless oats cookies,
mini GF doughnuts and raw truffles


Since I have been on my GF and DF diet I have found that I am becoming more of a sweet tooth; or maybe it's just age. Anyway, I find myself much more often craving for sweets, from the innocent dried fruit to the naughty chocolate bar in the pantry. So I try to make and find recipes that are made with natural ingredients and somehow healthy. Tonight I made 3 treats in mini sizes so we could all have a little bit of everything. Despite my love for chocolate, I must admit the mini doughnuts keep teasing me and I have found it hard to resist them (I had much more than what's on the plate).

For the Flourless oats cookies: (I have used the recipe from the fabulous chocolatecoveredkatie: http://chocolatecoveredkatie.com/2012/02/20/flourless-oatmeal-raisin-cookies/).

3/4 cup rolled oats
1/4 tsp baking soda
1/8 tsp salt
2 T brown sugar (I used cane sugar)
1 T plus 2 tsp white sugar or evaporated cane juice (I used agave nectar)
2 T raisins
1 T oil or pre-melted margarine
1-2 T milk of choice (start with 1)

Blend first 5 ingredients together in a food processor or blender. Mix Process with other ingredients, form into cookie shapes, and place on a greased cookie sheet. Cook 6 minutes at 375 F.
Those cookies are crunchy and sweet and just taste so nice.

For the mini GF doughnuts: (original recipe from http://www.browneyedbaker.com/2010/08/27/monkey-bread-recipe/) This is actually a monkey bread recipe and if you follow the link you can watch the recipe step by step.

Total Prep Time: 1 hour | Total Rise Time: 2 hours | Bake Time: 35 minutes

Dough:
4 tablespoons unsalted butter (I used coconut oil), divided, 2 tablespoons softened and 2 tablespoons melted
1 cup milk, warm (about 110 degrees F)
1/3 cup water, warm (about 110 degrees F)
¼ cup granulated sugar Cane sugar
1 package instant yeast
3¼ cups all-purpose flour, plus extra for work surface (To make it Gluten Free I used Orgran Gluten Free All- Purpose flour http://www.orgran.com/products/160/)
2 teaspoons salt

Brown Sugar Coating:
1 cup light brown sugar (cane sugar)
2 teaspoons ground cinnamon
8 tablespoons unsalted butter (1 stick), melted 5 Tablespoons of vanilla infused grapeseed oil- Equagold, http://equagold.co.nz/EquagoldProducts/tabid/6228/CategoryID/0/List/0/Level/a/ProductID/84/Language/en-US/Default.aspx?SortField=ProductName%2cProductName.

Glaze*:
1 cup confectioners’ sugar
2 tablespoons milk

*I have not made the glaze because I am thinking of trying of few different topping over the next couple of days... or maybe a chocolate fondue.

1. Butter flat dish with 2 tablespoons softened butter (or coconut oil if using). Set aside.

2. In a large measuring cup, mix together milk, water, melted butter, sugar and yeast. Mix flour and salt in standing mixer fitted with dough hook. Turn machine to low and slowly add milk mixture. After dough comes together, increase speed to medium and mix until dough is shiny and smooth, 6 to 7 minutes. Turn dough onto lightly floured counter and knead briefly to form smooth, round ball. Coat large bowl with nonstick cooking spray. Place dough in bowl and coat surface of dough with cooking spray. Cover bowl with plastic wrap and place in a draft-free area until dough doubles in size, 50 to 60 minutes.

3. For the sugar coating: While the dough is rising, mix brown sugar and cinnamon together in a bowl. Place melted butter (or oil) in second bowl. Set aside.

4. To form the bread: Gently remove the dough from the bowl, and pat into a rough 8-inch square. Using a bench scraper or knife, cut dough into 64 pieces.

5. Roll each dough piece into a ball. Working one at a time, dip the balls into the melted butter, allowing excess butter to drip back into the bowl. Roll in the brown sugar mixture, then layer balls in the Bundt pan, staggering seams where dough balls meet as you build layers (or if like me you do not want the layers, place them in a single layer on the flat dish).

6. Cover the pan tightly with plastic wrap and place in draft-free area until dough balls are puffy and have risen 1 to 2 inches from top of pan, 50 to 70 minutes.

7. Preheat oven to 350 degrees F. Unwrap the pan and bake until the top is deep brown and caramel begins to bubble around the edges, 30 to 35 minutes. Cool in the pan for 5 minutes, then turn out onto a platter and allow to cool slightly, about 10 minutes.

8. For the glaze: While the bread cools, whisk the confectioners’ sugar and milk in a small bowl until the lumps are gone. Using a whisk, drizzle the glaze over the monkey bread, letting it run over top and down the sides of the bread. Serve warm.

For the raw truffles: http://www.sweetlyraw.com/2012/04/raw-vegan-chocolate-mint-cake.htm.3 cups almonds
2 cups pitted dates
2/3 cup raisins
1/2 cup cacao powder
2/3 cup pecans pine nuts
1/8 teaspoon salt
1 teaspoon pure vanilla
1-2 teaspoons water, as needed

Grind almonds in a food processor. Transfer to a bowl.
Puree the dates and raisins in the food processor until smooth (or as smooth as you can get it).
Add the ground almonds, cacao powder, pecans, vanilla, and salt to the date puree and process to bring all ingredients together into a dough.
Press a bit of the dough in your hand. If it's still crumbly, add 1 teaspoon water (it will probably need it). Process again. Add a bit more water if needed.
Press the dough into a container and leave in the fridge to set for at least 30 min.

This recipe is actually a cake. I will try to make the cake myself because it looks delish! However, in treat sizes, everytime you need a chocolate hit, you just need to walk to the fridge and not feel so guilty. Of course there is quite a bit of fat in this BUT those are good fats and the sweetness comes from the dried fruits, no added sugar.

Happy Baking everyone :)


Saturday, 21 April 2012

R2D2 cake

 This is my Husband's second Birthday cake. He does like Star Wars so I thought it would be a nice one to make. It's a three tier cake: 
Top is Gluten Free and dairy free lemon and chocolate marble cake with chocolate and pear mousse.
Middle Tier is chocolate mud cake with ganache.
Bottom tier is a coconut cake and tequila and lime buttercream.
I have made the fondant myself and the legs are homemade Rice Krispie Treat.


Princess Castle cake

This is a cake I have made a little Princess' 5th Birthday last Friday. Both cakes are chocolate mud cake. Bottom tier is frosted with ganache, top tier is frosted with buttercream. The towers are made out of Ric eKrispie Treats and covered in fondant. The top of the towers are ice cream cones.


Thursday, 12 April 2012

Liverpool FC Birthday cake


Cake I made for my beloved husband for his Birthday today. He is a devoted Liverpool fan. The cake was Mississippi Mud cake with chocolate and peanut butter icing. The white writing is from fondant I made myself. It took me an hour to carve and decorate. This is the fastest I have ever been. I had to since my husband was sitting just a few feet in front of me playing video games while I was frantically trying to decorate before he got up and came to the kitchen (which is open plan too).
Anyway he loved it from both the looks and the taste. I will post the recipe soon as I have another one to make for the end of next week.

Here are a couple more pics:


Friday, 6 April 2012

Easter Toblerone Hot Cross Buns


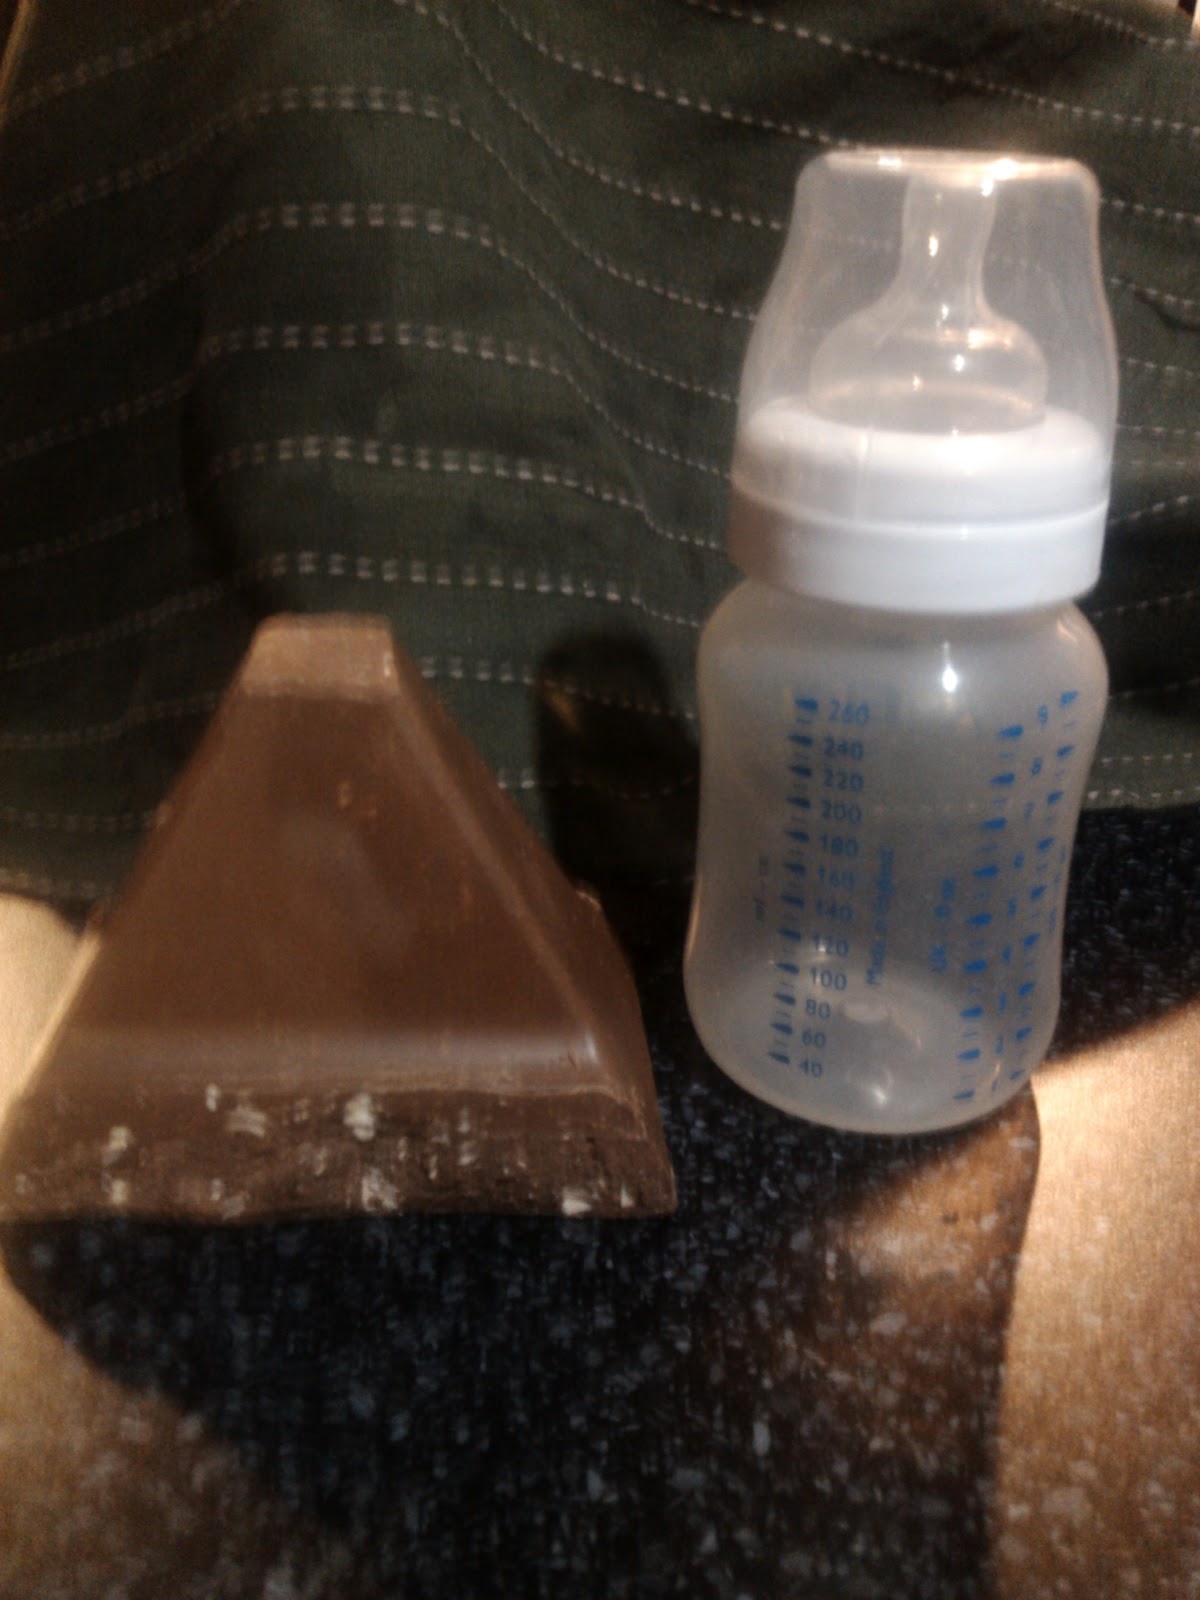
Last week my sister- in law came for a visit and brought me the 2 biggest pieces of Toblerone I have ever seen. I thought the ones you buy at the airport were the biggest you could find but was I wrong! Those ones are humengous!!!
Don't believe me??
I didn't have anything else for comparison than my son't bottle. But I guess it shows how big that one piece of Toblerone is!!!

Anyway, I made those special Hot Cross Buns for her and her beautiful family. I followed the Edmonds recipe with a few changes.

Ingredients:
1 1/2 cups of milk
1 teaspoon of sugar
1 tablespoon of butter
2 teaspoons Edmonds active yeast
4 1/2 cups Edmonds high grade flour
1 teaspoon salt
1 teaspoon cinnamon
1/2 teaspoon mixed spices
1/2 teaspoon ground nutmeg
2 teaspoons sugar
1 3/4 cups of mixed dried fruit
1 cup of tea (mine was lemon flavoured)
100g of chopped Toblerone

Crosses:
1/2 cup Edmonds high grade flour
3 Tablespoons of cacao powder
6 Tablespoons of water

Glaze:
1 Tablespoon sugar
1 Tablespoon boiling water
1 teaspoon gelatine

Heat the milk until almost boiling. Stir in the first measure of sugar and butter until butter melts. Set aside until lukewarm. Sprinkle yeast over and leave in a warm place for 15 minutes or until frothy.

Put the dried fruit is a bowl and pour the hot tea over. Leave aside until needed.

Combine 4 cup of flour with salt, cinnamon, mixed spices and nutmeg in a bowl. Stir in second measure of sugar. Make a well in the centre of the dry ingredients.

Pour the yeast mixture in. Beat to a soft dough, adding more flour if the dough is sticky.

Drain the fruit and add them to dough along with the pieces of Toblerone.

Turn onto a lightly floured board. Knead until smooth and elastic or until the dough springs back when lightly touched.

Lightly brush a bowl with oil. Place the dough in the bowl. Brush the top with oil. Cover and leave in a warm place until doubled in size.

Punch the dough in the centre and knead lightly. Divide the mixture into 16 even- sized pieces. Shape into balls. Place the balls 2 cm apart on a greased oven tray. Cover and leave in a warm place until doubled in size.

Pipe the crosses on each bun.

Bake at 200 Degree C for 20 minutes or until golden. Remove from the oven and brush with the glaze. Cool on a wire rack.

To make the crosses:
Mix together all the ingredients until obtaining a smooth paste. Place the mixture into a small plastic bag and snip one of the corners.

To make the glaze:
Boil the water and mix together with the sugar and gelatine until all dissolved. Brush onto the Hot Cross Buns.


Friday, 23 March 2012

Decorated cakes- 2010

Right I have a bit of time on my hands (that doesn't happen often) so I thought I would post some more decorated cakes before I head to the kitchen and bake some more.

This is a Birthday cake I made for a friend's Mother. She really enjoyed playing Tennis so I made this. The rackets are made in fondant and the cords are pipped with Royal Icing. The cake was chocolate covered with green fondant for the court and the lines are made out of Royal Icing.


Those were for one of my colleagues Birthday. It was a very last minute thing since we only decided to get something together the night before. I thought the theme of green and blue suited him.


This was for a very nice lady who used to work with my Husband. This was her Birthday and I'm not sure why but when I think of her I think "yellow" maybe because she looks so bright and happy every time I see her. This was a Banana cake (if my memory serves me right) covered in butter cream. The roses are handmade out of butter cream as well.


My Brother- in Law had to go overseas to work for a while. He is really into Kombi and since he has one, I tried to reproduce his as best as I could. Again that was a spur of the moment and it took me about 8 hours to make it from baking to the finish product. I finished with the pipping at around midnight. It was a lot of fun making it though. He liked it so much that he refused to cut it. It was a coffee cake with coffee butter cream.


One night I discovered Bakerella's website and I wanted to try those cupcake cake pops. I took them to work and they were a hit. They were made out of chocolate cake and cream cheese, dipped into dark chocolate and the top into Blue chocolate (Wilton). I added hundreds and thousands and a M&M's.


This was a chocolate cheesecake I made and decorated for my last day at work, the white layer is a home made chantilly and the flowers are hand made in Royal Icing. The pops are Apple pie pops.


Just as I was leaving work on annual leave, the lady who replaced me had a her daughter turning 1 so she asked if I could make her some cupcakes with a Princess crown on it. They were vanilla cupcakes with vanilla butter cream and the crowns were made out of fondant.

I will put up a few more later on. Happy Baking everyone :)

Thursday, 15 March 2012

Chocolate cake for my sister- in- law's Birthday


It was my Sister-in law's Birthday last week end and I though I would make her a nicely decorated cake. I thought I would make a chocolate cake with chocolate ganache and some simple yet elegant decorations. 
I got the recipe from one of my favourite baking sites: http://www.joyofbaking.com/ChocolateBananaCake.html.

Chocolate Banana Cake:


2 cups (400 grams) granulated white sugar
1 3/4 cups (245 grams) all-purpose flour
3/4 cup (75 grams) unsweetened cocoa powder (regular or Dutch-processed)
1 1/2 teaspoons baking powder
1 1/2 teaspoons baking soda
1/2 teaspoon salt
2 large eggs
1 cup mashed ripe bananas (about 2 medium sized bananas)
1 cup (240 ml) warm water
1/2 cup (120 ml) milk
1/2 cup (120 ml) corn, safflower or canola oil (or other flavorless oil)
1 1/2 teaspoons pure vanilla extract


Chocolate Banana Cake: Preheat oven to 350 degrees F (180 degrees C) and place rack in the center of the oven. Butter, or spray with a non stick vegetable spray, either a 9 x 13 inch (23 x 33 cm) pan or in my case 2 small round cake pans. Set aside. 
In a large bowl whisk together the sugar, flour, cocoa powder, baking powder, baking soda, and salt. Set aside.
In another large bowl, whisk together the eggs, mashed bananas, water, milk, oil, and vanilla extract. Add the wet ingredients to the dry ingredients and stir, or whisk, until combined. You will notice that the batter is quite thin. Pour the batter into the prepared pan and bake for about 35 to 40 minutes or until a toothpick inserted in the center of the cake comes out clean.  
Remove from oven and let cool on a wire rack. When completely cooled, frost with the Ganache.

For the Ganache
150ml of cream
2 cups of dark chocolate chips or pieces of chocolate cut in small pieces
1 teaspoon of butter (to make it glossy)

Prepare the chocolate in the medium size heatproof bag. Bring the cream just to the boil. Pour onto the chocolate. Add the butter. Let is all melt for a couple of minutes. Stir slowly until the mix is all smooth and shiny. Let it cool  until it gets thick enough to be easily spread.

Chocolate Banana Cake: Preheat oven to 350 degrees F (180 degrees C) and place rack in the center of the oven. Butter, or spray with a non stick vegetable spray, a 9 x 13 inch (23 x 33 cm) pan. Set aside. 
In a large bowl whisk together the sugar, flour, cocoa powder, baking powder, baking soda, and salt. Set aside.
In another large bowl, whisk together the eggs, mashed bananas, water, milk, oil, and vanilla extract. Add the wet ingredients to the dry ingredients and stir, or whisk, until combined. You will notice that the batter is quite thin. Pour the batter into the prepared pan and bake for about 35 to 40 minutes or until a toothpick inserted in the center of the cake comes out clean.  
Remove from oven and let cool on a wire rack. When completely cooled, frost with the Ganache.

Assembly 
Once the cakes are completely cool. Cut horizontally in half. Pour some of the cold ganache and spread to about 0.5cm from the edges of the cakes. 
Ice the biggest cake fully. Place the smallest one over (I didn't use any dowels as the cakes were small and the ganache fairly sticky). Ice the top cake. You can let the ganache drip on the second cake as well. Put the cake in the fridge for about an hour.
Once an hour has past the ganache should be "hard"enough. Boil some water and place it in a bowl or a plunger. Using a palette knife, you will "hot knife" the ganache to make it look more even. Plunge the palette knife in the hot water, dry it with a paper towel or hand towel and smooth the cakes. The heat will make the ganache melt a little and you will be able to give your cakes a better finish.


Add the decorations of your choice. I just placed some Royal Icing roses I had made the night before.

Here are a few more pics of the one I made. 


Tuesday, 21 February 2012

Another decorated cake

It was my sister- in- law's Birthday last week end and we arranged to meet in the park so my little Monkey could run around a bit.
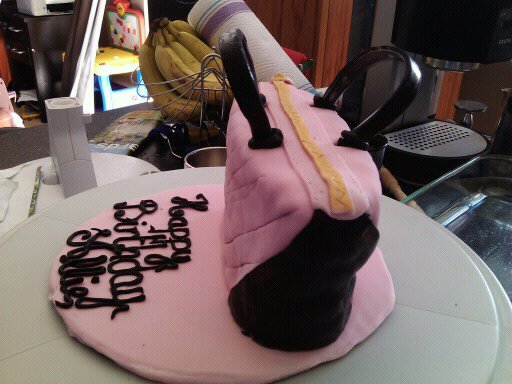
I made her the cake below. It was the ginger cake recipe that I have posted earlierhttp://www.thebakingfrog.blogspot.co.nz/2012/02/im-not-one-to-brag-but-this-gingerbread.html, with some white chocolate ganache, covered with fondant and royal icing pipping. It took me about 3 and a half hours to decorate it. I couldn't find some of my tools (it was getting close to midnight) so I used a pizza cutter for the details on the bag. I must have been quite tired because I went a bit deep on some of them.
Enjoy:)