Showing posts with label Savoury. Show all posts

Sunday, 10 June 2012

New Gluten Free burger buns


I had a very bad run with making Gluten Free breads lately. Some were too crumbly and inedible by the time they had spent a night out, and others looked and sounded cooked but as soon as I took them out of the oven and the dish they would collapse and completely gooey inside. I had almost given up.
I went to get some more Gluten Free flours to try it a few more times. After all even despite the failures, it was still cheaper to make my own bread (even if I could only eat one to two pieces).
I told the owner about my misfortune and he gave me an excellent tip: use a mix of flour and less or no starch plus add 1 teaspoon (to start with) of psyllium husk. The psyllium husk, he told me, will make a more spongy bread so it won't dry and crumble.

Yesterday I decided to face my fear of failing again and made up my own flour mix and bread. Eureka! Success at last, although it is a little crumbly today it still tastes very nice and can be cut without leaving big chunks of dry bread behind. Next time (which is likely to be tonight), I will try with 2 tsps of psyllium husk (I will post the results asap).

So here it is:

Flour mix 1 (I am thinking of trying out some different ones later)
1 cup of sorghum flour
1 cup of oats flour
1/2 cup of millet flour
1/2 cup of rice flour
2 tsps of xanthan gum
1 tsp of psyllium husk
1/4 tsp of salt

Wet mix:
2 eggs
1 Tbsp of agave syrup (or white sugar)
3 Tbsp of olive oil
1 tsp of vinegar

For the yeast starter:
1 1/3 cup of warm water
2 tsps of yeast
1 tsp of agave syrup (or white sugar)

Mix the agave syrup with the warm water. Add and mix the yeast. Set aside until frothy.

Whisk all the flours together with the xanthan gum, psyllium husk and salt.

In a stand up mix bowl, beat the wet ingredients. Once all mixed well, add the yeast starter. Stop the mixer and dump all the flour mixture in the wet. Mix again for about 5 minutes.

Note: if you want to make little burger buns like the ones I made you will need to use a grease muffin pan.

Pour the mixture into a grease pan and leave to rise in a warm, draught- free environment. I put my mixture in the oven preheat at 50 Degree C. Let is rise until it has doubled in size.

Bake at 200 Degrees C for about 30 minutes or until golden brown.  To make sure it is cooked knock on top of the bread, it should sound hallow.

Take it out of the oven and leave to cool a little. As soon as you can handle the bread, take them out of the pan, otherwise the crust will go soggy.

As usual in 24 hours I have eaten the whole loaf I had made and the burger buns, so it's back to the kitchen this afternoon to make some more.

Happy Baking everyone :)


Thursday, 31 May 2012

Gluten Free Pizza (take 2)

Gluten Free pizza base, homemade tomato sauce, bacon
Italian sausages, spinach, goat's feta cheese
Last night we had pizza and I thought I wanted to try a new recipe. I looked on one very good Gluten Free website: http://glutenfreegoddess.blogspot.co.nz.

The recipe is pretty straight forward however there is a little trick to place the dough into the dish.

2 cups tapioca flour/starch
1 cup sorghum flour
1/2 cup brown rice flour
1/2 cup GF millet flour
3 teaspoons baking powder
2 teaspoons xanthan gum
1 teaspoon fine sea salt
3 tablespoons organic light brown sugar  honey
1 1/4 cup warm water (between 110 - 115ºF)
1 teaspoon organic light brown sugar honey
1 packet (1/4 ounce) active dry yeast
1/4 cup good olive oil
1/4 cup beaten organic free-range egg whites (or egg replacer for two eggs)
1/4 teaspoon light tasting rice vinegar

Instructions:
Grease two 12-inch pizza pans and dust lightly with gluten-free flour. Set aside.
In a large mixing bowl, whisk together the flours and dry ingredients.
Proof the yeast in 1 cup warm water with a pinch of sugar.
Add the proofed yeast to the dry ingredients. Add the oil, eggs and vinegar.
Beat the dough until smooth and sticky. The pizza dough should be creamy smooth and not too thick- it's not sturdy like typical bread dough. It almost borders on batter.
Using a silicone spatula divide the dough in half. Scoop each half onto the center of a prepared pizza pan.

Tip for spreading the dough: Using clean, wet hands press down lightly and flatten the dough to create a thin, even pizza shell, with slightly raised edges. You'll have to rinse your hands more than once to do this. Take your time to smooth out the dough with wet palms.
I would recommend to this operation next to the sink, you literally have to rinse your hands every second time you touch the dough but it is well worth it.
Set the pizza shells in a warm cozy spot to rest and rise a bit- about 15 minutes.

Blind bake at 200 Degree C for about 15 minutes.

Leave to cool and take it out of the pan. Spread the sauce and add the topping. Place back in the oven to back for another 20 minutes. Your dough will be very crispy just like the non gluten free pizza.
I didn't do the above the first night and my dough was crispy on the outside but kind of soggy on the inside where most of the topping was. Tonight I followedf my own instructions and it worked perfectly. It is a bit of work but well worth it. I would have posted a picture but... well I ate it all, it was THAT GOOD!

Happy Baking everyoone :)

Italian sausage pizza on the go!!!

Ok so not the prettiest food you've ever eaten but
very practical to take anywhere.


Last night we had pizzas and they were so good that my Husband mentioned that it was so good, he didn't mind having more tonight.
Here is the one I made for the boys:

For the pizza:
It was a simple pizza with bacon, Italian sausages, cheese, homemade tomatoe sauce and the Italian Sausages or as we cal them at home: the "Magic Sausages" because we always make them last for more than one meal.

To make this pizza, I used my usual recipe: http://thebakingfrog.blogspot.co.nz/2012/05/pizza-bread.html

For the tomato sauce, in a saucepan mix 2 cans of tomatoes in juice, add a good Tablespoon or 2 of honey, a teaspoon of salt and some dried oregano and leave it to reduce on low to medium heat, stirring regularly so the sauce doesn't catch at the bottom of the pan. Once thick and reduced, leave it aside to cool.

Blind bake the dough at 200 Degree C for about 15 minutes or until the dough feels dry, don't let the dough turn bgolden because it will cook again later with the topping and might get overcooked.

Once ready, take it out of the oven and spread the tomato sauce, add your topping and return to the oven for another 10 to 15 minutes until the cheese is nicely melted.

For the rolls:
Roll the dough into a rectangle about 15 cms long and the width of the sausage you are using, even a llittle wider.

Spread the prepared tomato sauce. Slice some cheese and place on top of the sauce. Place the sausage over the cheese and roll the dough as you would roll a spring roll. Roll the dough around the sausage, tuck the sides in and keep rolling until the end of the dough.

Bake at 200 Degree C for 20 minutes or until golden brown.

I have found this might be a good snack to take to work or on a picnic. It is easy to transport, will not spill and easy to eat anywhere even if you don't have any cuttlery.


Happy Baking everyone :)


Friday, 18 May 2012

Sliders and Chips for dinner

The sliders I made for my husband and mini sliders and chips for my son
My Husband has been wanting to eat sliders ever since we saw "Harrold and Kumar go to White Castle", which was roughly 6 years ago. We had rented the movie with no expectations and it became one of our favourites. My poor Hubby has been sick for the last week and yesterday he told me:"I'm feel like eating a burger, actually I really want a burger with chips and a chocolate milk shake". And I knew he meant business and if I didn't do anything about we would end up having take away food with its excessive salt, fat and cost.
I jumped off the sofa and declared: "There is no chance we will ever go to White Castle, so let's bring White Castle to us. I will make you the sliders you have been wanting for so long." Of course, this was a challenge. You generally cannot rival with the idea someone has made of something they have been craving for 6 years. But I was up to it.
I found a recipe of brioche buns on the following link and though that was the closest I would get to the ever- so wanted sliders. http://www.nytimes.com/2009/07/01/dining/011brex.html?_r=1.

Ingredients:
3 tablespoons warm milk
2 teaspoons active dry yeast
2 1/2 tablespoons sugar
2 large eggs
3 cups bread flour
1/3 cup all-purpose flour
1 1/2 teaspoons salt
2 1/2 tablespoons unsalted butter, softened.

Note: There is a waiting time of about 4 hours as they are 2 rises for those buns, however even with the cooler temperatures outside mine only took 30 to 45 minutes each because I had the oven on as well.

1. In a glass measuring cup, combine 1 cup warm water, the milk, yeast and sugar. Let stand until foamy, about 5 minutes. Meanwhile, beat 1 egg.

2. In a large bowl, whisk flours with salt. Add butter and rub into flour between your fingers, making crumbs. Using a dough scraper, stir in yeast mixture and beaten egg until a dough forms. Scrape dough onto clean, unfloured counter and knead, scooping dough up, slapping it on counter and turning it, until smooth and elastic, 8 to 10 minutes.

3. Shape dough into a ball and return it to bowl. Cover bowl with plastic wrap and let rise in a warm place until doubled in bulk, 1 to 2 hours.

4. Line a baking sheet with parchment paper. Using dough scraper, divide dough into 8 equal parts. I cut the dough into 4 and rolled into logs. I then cut the logs with the dough scraper in 12 balls. I still had some dough left to make the mini sliders. Gently roll each into a ball and arrange 2 to 3 inches apart on baking sheet (in a brownie dish if you want them small enough for sliders otherwise just on a baking sheet for normal burger buns). . Cover loosely with a clean kitchen towel and let buns rise in a warm place for 1 to 2 hours.

5. Set a large shallow pan of water on oven floor, I skipped this step since I baked them in my little convection oven and they turned out great. Preheat oven to 400 degrees (about 200 Degree C) with rack in center. Beat remaining egg with 1 tablespoon water and brush some on top of buns. Bake, turning sheet halfway through baking, until tops are golden brown, about 15 minutes. Transfer to a rack to cool completely.

This recipe made 12 sliders and about twice that in mini sliders

Mini sliders and chips for my little one
Apologies about the Bold below, my computer refused to format it.... Arggggg!
While the dough was rising for the second time, I prepared the meat. It was a very simple patty. I had some rump steak that I threw in the food processor with an onion cut in quarters, 3 cloves of garlic and a Tbsp of Barbeque sauce. I processed the lot and made them into patties. Generally I would leave them in the fridge for about 30 minutes to set but this time there was just no time. They tasted great still even withouth the rest time.
I pan fried them and slapped a slice of cheese over, back in the oven for 5 minutes just to melt the cheese a little and keep it in place on top of the patty.
I served it with homemade chips, and chocolate milkshake for the boys (made with my homemade chocolate bar) and a coconut, chai and vanilla milkshake for me.
I hope you enjoy those as much as my boys did.
Happy Baking everyone :)


Tuesday, 15 May 2012

Easy slow cooked pork chop chilli


On Monday I thought it would be a good idea to have pork for dinner. We bought those huge pork chops at our local butcher on the week end and one was enough for us 3.
But 3 pm came and I still had no idea what to do with that humengous defrosted pork chop starring at me from the bottom shelf of the fridge. Then, an epiphany! "Tonight we shall have chilli", I declared.
WARNING: this recipe takes a couple of hours.
So on with it.
Ingredients:
1/2 a brown onion, finely diced
2 cloves of garlic, smashed
1 Tbsp of oil (I used canola)
1 tin of tomatoes in their juice
2 cups of chicken broth
1 tsp of paprika
1/4 tsp of ginger
1/4 tsp of coriander
About 250g of pork
2 tins of beans (I used red kidney)
1Tbsp of brown sugar
Heat the oil in a oven proof dish (that has a lid or can be covered with aluminum paper) and fry the onions until translucent. Add the garlic and spices and cook until fragrant. Add the tomatoes, cook until bubbling and then add the broth.
Preheat your oven to 150° C.
Add the pork. (I actually put the whole chop in and because it cooked at low temperature for 2 hours, the meat fell off the bone.)
Place in the oven and leave it alone.
An hour to 45 minutes before serving, add your beans and about 1 Tbsp of brown sugar ( this helps balance the acidity of the tomatoes), stir and place it back in the oven for another hour approximately. Check on it regularly to make sure this is not catching at the bottom of the pan.
Serve with avocado, sour cream if you have some (I actually used cream cheese for the boys) and crusty bread.
Tip: I made up this recipe with what we had in the fridge and pantry. Those are pretty much essentials we always have around. I try my best to not go grocery shopping too often to save us some money. The only items I would tend to get regularly (not on grocery shopping day) are fresh fruits and veggies, bread and milk.
I trend to make up recipes with what I have rather than the other way around.
Happy cooking everyone:) and don't forget to join The Baking Frog on Facebook. Just click on the Like button at the top of the right column.

Sunday, 13 May 2012

Pizza bread

Plain pizza bread

Pizza bread with Cream Cheese

A couple of days ago, as we were driving to get some shopping done, my Husband and I were talking about what we were going to have for dinner, when a little chirpy voice came from the back of the car saying "Pizza". Needless to say, I was very surprised so I asked my son again, "What would you like for dinner? " and again I was told with a very wide smile "Pizza".  That was it, my son had requested food, so that's what he was going to have for his dinner. I therefore made the pizza and ended up with enough dough to make another, except, I ran out of the toppings. I thought of something else to do with it and since I had a block of cream cheese in the fridge, I decided to go with a Cream Cheese filled Pizza Bread.

Tonight, for Mother's Day we had Roast Beef with roast vegetables and my Husband wanted some more that pizza bread without the filling. The poor filled pizza bread did not live that long anyway... So I made the pizza dough again and shaped it into a ball, baked it and here was the bread. It is nice and crunch on the outside and very soft on the inside. Best of all, it is so easy to make, you'll be able to eat it every day.

Ingredients:
1 1/3 cup of warm water
1 1/2 tsp of active dried yeast
1 tsp of sugar
3 cups of plain flour
3 Tbsp of olive oil
Pinch of salt

1- Mix the water and sugar in a jug or a bowl. Add the yeast, stir a bit to mix and set it aside to bubble away.
2- In another bowl, put the plain flour and salt and stir and make a well. Don't put your flour container away, you will need it again to flour the work space when you knead the dough. I always put it away and when it's too late (i.e. hands full of sticky dough I realise what I've done)
3- Once the yeast has worked its magic, pour it in the middle of your well. Add the olive oil and mix with your hands. Once the dough comes into a ball, flip it onto a floured work space and knead until the dough is smooth and elastic. 
4- Place the dough in a bowl sprayed with oil, cover with a plastic film also sprayed with oil and leave to rise in a warm place. 
5- Once the dough has double in size (about 30 minutes for me since the oven was on), punch it, take it out of the bowl onto a floured work space and knead some more, until the dough stop sticking to the bench. 
6- Shape it into whatever you want to make (roll it if you are feeling like a pizza) and bake until the outside in golden brown and when tapping on it, it sounds shallow.

Note: my husband is having a piece now that he has toasted and spread with Peanut Butter and well, let's just say that I think this bread will appear again and again in this house especially throughout winter. I can actually hear the crunch of him biting in it...


Happy Baking everyone :)

Monday, 7 May 2012

Flaky pastry

Pretty please with my layers!!!
Right, the cold weather is creeping on us, my husband and I are tired because our son has had a few issues with getting through a whole night without waking up and this morning I was on the phone with my husband who told me that he must have been tired because he was craving a pie and a chocolate milk shake. I thought, well we are having beef for dinner, there is obviously way too much for one dinner, let's make him a pie. So I actually made 3 smaller ones so he can have one tomorrow for lunch and the rest can go in the freezer in case of an emergency.
My craving luckily was for cookies which I happen to have at home... Well, I "borrowed" some of my son's. They are those cute little Gluten and Dairy Free bears with choc chip. They are DELICIOUS so I am also in the process of trying to make them myself... Watch that space.

Anyway, we were talking pies and to make a pie you have to start with the pastry.

I made my own flaky pastry from my trusted Edmonds' cookbook. I was really tempted to taste it, it smelled so nice while it was baking... Let's see if you can resist.

Ingredients:
2 cups of high grade flour (I only had self raising and it worked)
1/4 teaspoon of salt
200g of butter
6 Tablespoons of cold water, approximately

Sift the flour and salt into a bowl. Cut one- quarter of the butter into the flour until it resembles fine breadcrumbs.

Add sufficient water to mix into a stiff dough.

On a lightly floured board roll out dough to a rectangle0.5- 1 cm thick. With the short end of the rectangle facing you , dot two0 third of the pastry with a third of the remaining butter to within 1 cm of the dough edge. Fold the unbuttered pastry into the middle of the pastry. Fold the buttered section over the folded edge. Seal the edges with a rolling pin and mark the dough with the rolling pin to form corrugations.

Give the pastry a quarter turn. Roll into a rectangle.

Repeat twice until all the butter is used.

Chill the pastry for 5 minutes between rollings if possible.

Use as required for savoury pies and vol au vents.

Makes 500g pastry.


I will post the recipe for the pie itself tomorrow after I get the verdict from the expert.

Happy Baking everyone :)

Thursday, 3 May 2012

Short pastry for savouries

Slice of vegetable and ham quiche


When it comes to pastry I generally refer to my bible: The Edmond's cookbook. Everyone should have one of those at home. The pastries are just divine (and I am talking from experience from before I was gluten free). So tonight I got if off the shelf and made a beautiful short pastry.

Ingredients:
- 2 cups of all purpose flour
- 1/4 tsp of salt
- 125g of cold butter
- 1 cup of cold water

Sift the flour and salt together. Cut in the butter until it resembles fine breadcrumbs. Mix to a stiff dough with a little water. Roll out very lightly and do not handle more than necessary.

Place in your dish and blind bake at 200 Degree C for about 12 minutes. Remove the baking blind material and return to the oven for about 1 minute to dry the pastry out. Remove from the oven, pour the filling into the shell. return to the oven and bake for a further 30 minutes or until the filling is golden and set.

For the filing of this quiche follow the link: http://thebakingfrog.blogspot.co.nz/2012/05/gluten-and-dairy-free-quiche-with.html

Gluten and dairy free quiche with homemade Soy Ricotta

My 2 little quiches
You know that moment of panic when you realise you have taken anything out of the freezer for dinner tonight? Well this is what happened to me. Although I might be luckier than most that I am a stay at home mum of a little monkey who decided to sleep for two and half hours this afternoon leaving me time to make 2 types of pastries and a homemade soy ricotta. I have to admit that I imagine the ricotta to turn out so badly that I didn't take any pictures of it but next I certainly will. It is really easy to make and can, of course be made with cow's milk. I am actually thinking of trying it again with goat's milk (watch this space).

For the soy ricotta I inspired myself from this website: http://www.101cookbooks.com/archives/000282.html.

I just heated up 1Litre of soy milk and added 4 tsp of white vinegar to it. I let it boil to 80 Degree C, took it off the heat, and scooped the curds into a pre- prepared colander lined with a cheese cloth. I let it drip a bit and then hung it on the clothe line outside to cool and keep drying. I left it there for about 15 minutes. I then put the soy ricotta in a container in the fridge until I needed it tonight... Not quite actually, I did spread some on some corn cracker some with salt and dried herbs and others with honey... That was a delicious, easy and quick lunch.

For the pastry. I have used this recipe with a few changes. You can find the original recipe here: http://jeenaskitchen.blogspot.co.nz/2008/01/how-to-make-gluten-free-pastry.html.

- 1 cup of buckwheat flour
- pinch of salt
- 1/4 tsp of xanthan gum
- 2 Tblsp of olive oil
- 1Tblsp of canola oil
- 1 tsp of coconut oil (this made the pastry very buttery tasting)
- cold water

Mix the buckwheat flour and salt well. Add the oil. With a pastry knife or a butter knife mix the flour and oils. The pastry should still look a little dry with lumps.
Slowly add the cold water and mix with your hand. Once you can roll the pastry into a ball, it's ready.

I wrapped mine in some plastic film and put it in the fridge for about 30 minutes.

I blind baked it just before I prepared the filling for about 15 minutes at 200 degree C.

For the filling:
- 1 cup of frozen vegetables (defrosted in the microwave for 5 minutes or less)
- 1 Tbsp of non- dairy butter (I use avocado Olivani)
- 1 cup of ham (cut into cubes)
- 1 Tbsp of rice flour
- 1/2 cup of milk (preferably at room temp)
- 1 egg (beaten)
- Salt and pepper to taste

Melt the butter in the pan. Add the vegetables and the ham. Let them warm up and get coated with some of the butter. Add the rice flour and stir the vegetables and ham so they are coated in it. Add the milk slowly and keep stirring to avoid lumps. Add the egg, stir so it is completely combined. Season to taste.

Place the filling into the shells and bake until set and warm through. For those little ones it took about 20 minutes.

Cut in the middle, before being devoured

I guess it would have been nice with a fresh green salad but it was packed with vegetables so I guess the goodness is still there.

Happy baking everyone :)


Tuesday, 1 May 2012

Stuffed crepes (with gluten)

Here is the gluten version... Leftover chicken soup stuffed crepes.

For the crepes:
- 2 cups of all purpose flour
- 1 tsp of salt
- 1 cup of buttermilk (1 cup of soy milk with a tsp of vinegar)
- 1 cup of soy milk
- 2  Tbsp of oil ( I used Canola oil)
- 1/2 cup of water (only if needed).

mix all the dry ingredients together. In a jug, mix all the wet ingredients together. Pour the wet ingredients with the dry ingredients. Mine looked very liquid but it cooked nicely.
Heat a non stick frying pan and  spray with oil or melt a little nob of butter. I used 2 big tablespoons of batter for the size of my pan. Cook the first side until you can easily lift up the crepe, around 2 minutes, flip it and cook for another minute or 2.


You can find the rest of the recipe on this link and feel free to post some ideas for fillings: 
http://thebakingfrog.blogspot.co.nz/


My little Dude loved it and almost cleaned his plate. The portion might have been a little big.

Happy Baking everyone :)

Gluten and dairy free stuffed crepes


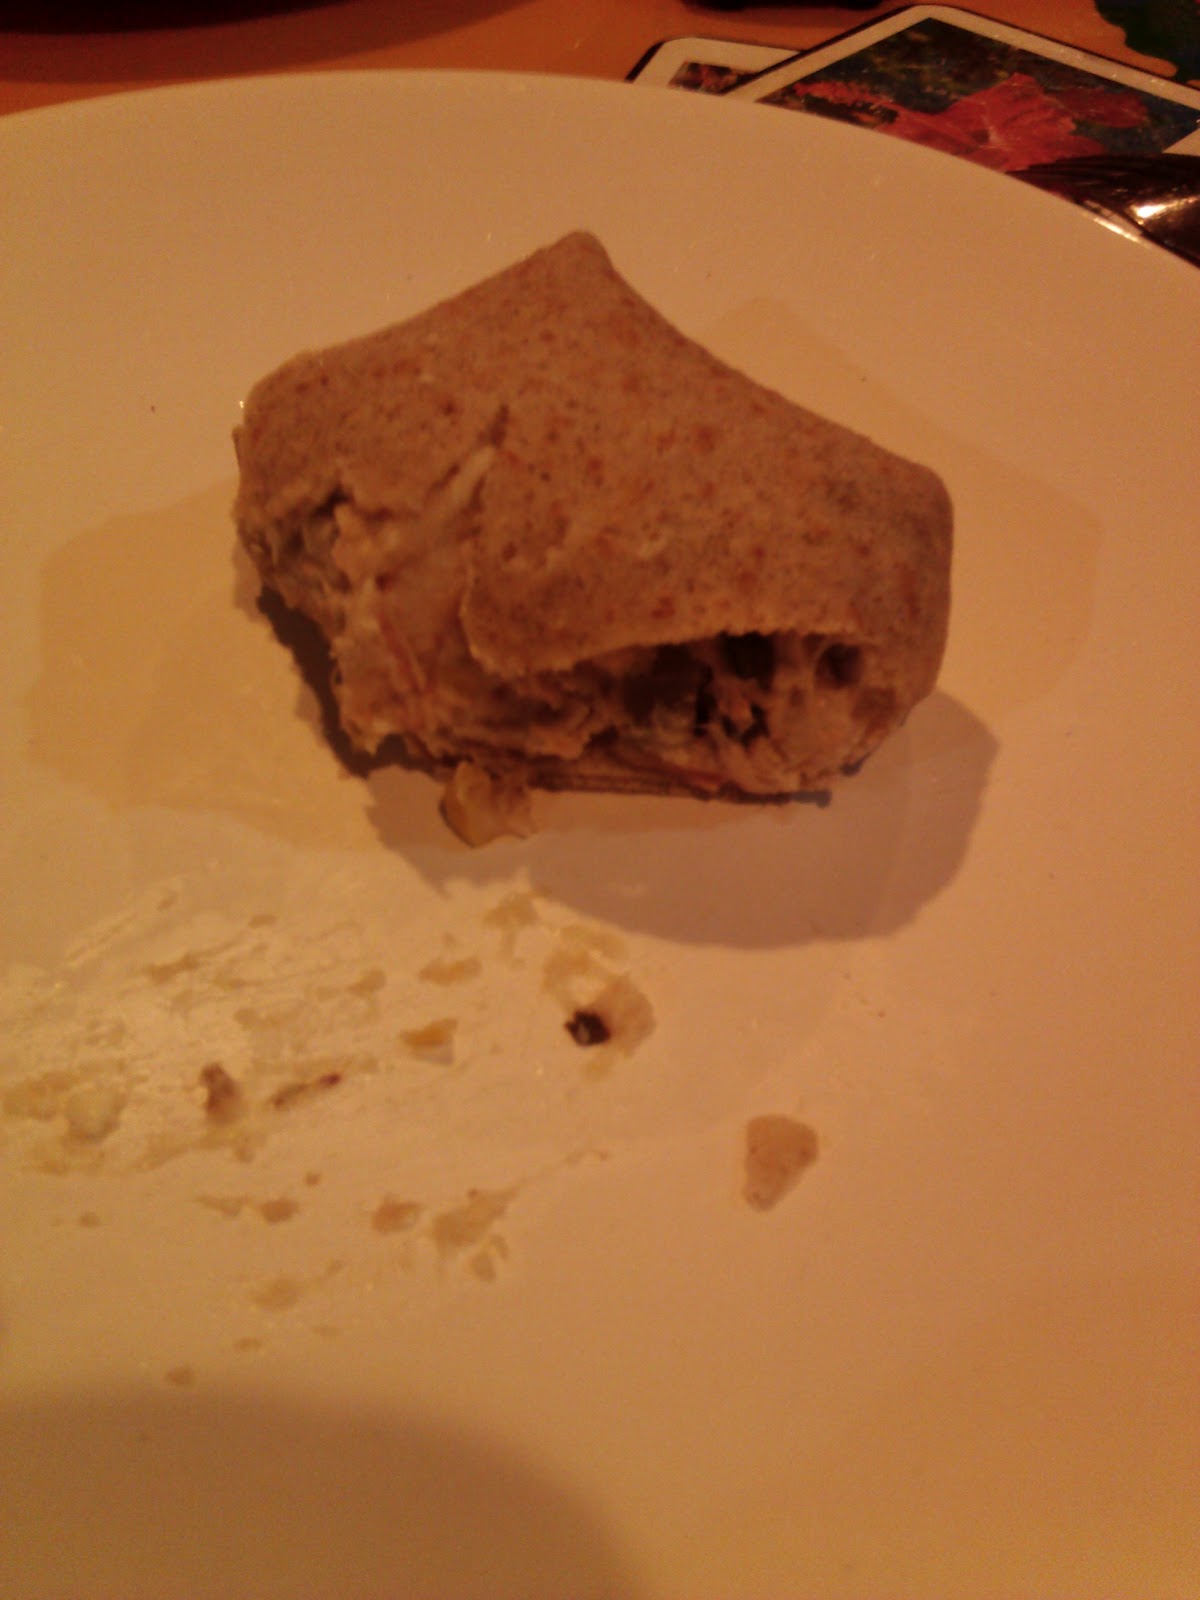
I was sick last week and my wonderful husband made a delicious chicken and vegetable soup. However he did make enough to feed a small army. So what do you do with leftover soup. Well among other things: stuffed crepes. I made the gluten free version for me and a "normal" one for the boys.

I can only give you the recipe for the crepes and the bechamel for the filling but sorry the secret is jealously kept for the soup (if I ever get it from my husband I will post it).

For the crepes:
- 1/3 cup of buckwheat flour
- 1/3 cup of water chestnut flour
- 1/3 cup of quinoa flour
- 2 Tbsp of almond flour
- 3 Tbsp of rice flour
- 1 cup of buttermilk (1 cup of soy milk mixed a tsp of rice vinegar)
- 1 egg
- 1 cup of soy milk
- 1/2 cup of water (my dough was more of a pancake dough so I loosened it with water)
- 2 Tbsp of oil (I used canola oil)

Easy peasy from here: mix all the dry ingredients together. In a jug, mix all the wet ingredients together. Pour the wet ingredients with the dry ingredients. Mine looked very liquid but it cooked nicely.
Heat a non stick frying pan and  spray with oil or melt a little nob of butter. I used 2 big tablespoons of batter for the size of my pan. Cook the first side until you can easily lift up the crepe, around 2 minutes, flip it and cook for another minute or 2.

For the bechamel:
- 1/2 cup of soy milk
- 1 cup of chicken broth (from the leftover soup)
- 4 Tblsp of rice flour
- 1 Tblsp of dairy free butter (I use avocado Olivani)

Put the milk and butter into a pan and heat until almost boiling. Slowly add the flour and whisk to avoid any lumps. (if you do get some, you might want to strain your sauce). Place it into a bowl to cool.
Once cool, add the rest of your filling ( for us veggies and chicken), stir.

Assembly:
- Crepes
- Filling
- Anything else you might feel like (I used goat cheese for mine despite being dairy I don't feel ill with this one), you could use herbs, chilli, ...

Spread the crepe, add a generous Tablespoon of the filling and flip the bottom of the crepe over the filling, then do the same with the sides and finally the top. It should look like a little parcel.

Place in the oven preheat at 150 Degree C and warm through for about 20 minutes and serve.

Note: you can put anything in the crepes. Any suggestions?

Happy Baking everyone :)

Monday, 12 March 2012

Pizza crust- Martha Stewart style

When both Child and Husband like something, I really need to save the recipe because it is likely to be done again and again and again. I have to admit, I LOVE the recipes Martha Stewart comes up with and I spent the last couple of days looking at her website for recipes, inspirations and ideas. I have found the pizza crust recipe and since we had decided to have pizza that night, I thought: "why not?!". So here is the recipe, (that can also be found on her website: http://www.marthastewart.com/341925/pizza-dough.


Ingredients

  • 2 1/4 teaspoons active dry yeast (one 1/4-ounce envelope)
  • 2 cups warm water (105 degrees to 115 degrees)
  • 5 to 5 1/2 cups unbleached all-purpose flour, plus more for dusting, preferably organic
  • 2 teaspoons fine sea salt
  • Extra-virgin olive oil, for bowl

Directions

  1. Dissolve yeast in warm water in a large bowl and let stand for 5 minutes. Stir in 3 cups flour and the salt, stirring until smooth. Stir in an additional 2 cups flour; continue adding flour (up to 1/2 cup), 1 tablespoon at a time, stirring until dough comes away from bowl but is still sticky.
  2. Turn dough out onto a lightly floured work surface, and knead with lightly floured hands. Start by slapping the dough onto the counter, pulling it toward you with one hand and pushing it away from you with the other. Fold the dough back over itself (use a bench scraper or a wide knife to help scrape dough from surface). Repeat until it's easier to handle, about 10 times. Finish kneading normally until dough is smooth, elastic, and soft, but a little tacky, about 10 minutes.
  3. Shape dough into a ball and transfer to a lightly oiled bowl; turn to coat. Cover with plastic, and let rise in a warm place until it doubles in volume, 2 hours. Press it with your finger to see if it's done; an indent should remain.
  4. Scrape dough out of the bowl onto floured surface, and cut it into 4 pieces. Shape into balls. Dust with flour, and cover with plastic. Transfer to refrigerator, let rise overnight.
I have not actually followed the last step since we need the pizza dough for the same night and it was delicious. I would just point out that the dough is like bread so I would recommend to oil the dish you are cooking it in. Ours got stuck and we had to scrap it off, losing quite a bit of it. Despite having the big pizza pictured, I still have enough dough to make another one. My little one didn't use to like pizza much because he used to find it quite difficult to eat, this time he cleaned his plate!!!

Monday, 16 January 2012

Today the lil monkey had Empanadas for lunch

So today my lil' Monkey and I were so focused on buying him some sun glasses that we didn't think about lunch. Luckily he went down just long enough for me to make something yummy: empanadas.
I thought those are great because really you can stuff any leftover in them. For my little one I filled them with ham, onions, green capsicum, cheese and a grated kumara. I cooked the filling first so it had time to cool.

Then I made the pastry that I have found on this website: http://blog.superhealthykids.com/2011/02/starting-e-week-with-empanadas/. 
This site has awesome recipes for kids.

Ingredients:
- 3 Tbsp of butter (I used reduced fat margarine)
- 1 Tbsp of olive oil
- 1 Tbsp of white vinegar
- 1/2 cup of water
- 1 tsp of salt

Place all the ingredients in a pan and bring to a boil. Remove from the heat and stir in:
- 1 cup of whole wheat flour
- 1 cup of white flour.

Put the dough in the fridge until it has cooled. Once the dough is cool, roll out and cut into circles or squares out of the dough. Fill with desired filling. Bake at 180 Degree C for 20 minutes or until the bread dough is browning and cooked through.


I made mine into kind of ravioli shape and the lil monkey loved them... Considering that lately he would only eat eggs or Terriyaki chicken with rice, I feel we have achieved something here.

Tuesday, 29 November 2011

Sweet sticky pork meatball and veggies rice


That's what we had for dinner tonight and judging how dinner time was quiet I believe I have won the seal of approval of my boys.

So if you feel like having something sweet and sticky for dinner as well here is the recipe:
For the pork meatballs:
500g of pork mince
2 cloves of garlic finely chopped
1/2 brown onion
1 egg
2 tbsp of cornflour

Mix all the ingredients together, form medium sized balls (or the size that you feel you will want to eat), place them on a plate and put them in the fridge for about 30 minutes. All the recipes I have found deep fry the meatballs and then place in the marinade. We don't deep dry in our house so I pan fried them until golden brown and then placed them in the oven. Keep the pan aside for the sauce.

For the sauce:
1 Tbsp of runny honey
1 tsp of cornflour
1 cup of hot water
1 Tbsp of Terriyaki sauce (soy sauce will do if you don't have it)

Mix all the ingredients together in a jug and make sure everything is well mixed. Place it in the pan used for to fry the meatballs, bring to a boil and simmer on very low heat until it become sticky and thick.
Take the meatballs out of the oven and put them in the pan to coat them with the sticky sauce. At this stage you could even through a few sesame seeds if you want.

I hope you enjoy those as well as we did. I made a veggies rice with cashew nuts to go with it. It was very filling and delicious.

Monday, 21 November 2011

Jerk Chicken


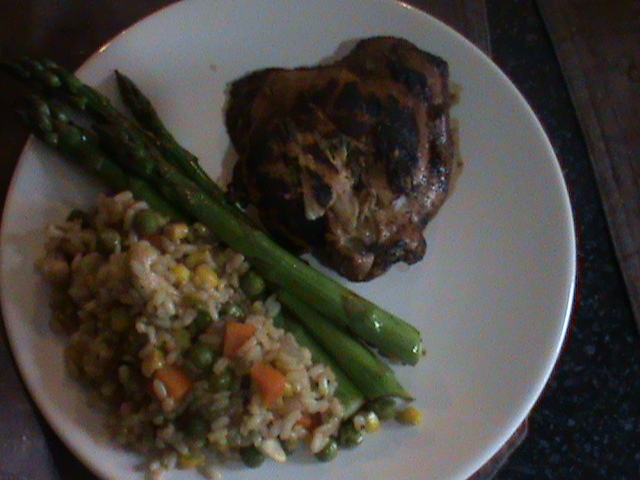
Since I have started posting savoury recipes I have been really exciteda bout trying new flavours. One thing I have always heard of but never tasted was Jerk Chicken and I happened to have some chicken on hand for Thursday night dinner.
I made the marinade the night before and let the chicken "sleep" in it overnight.
I have found the recipe on this website: http://simplyrecipes.com/recipes/jerk_chicken/ and made a few changes. First change I made, I divided the recipe by 2 since I only had 3 thighs.

  • 1/2 cup malt vinegar (or white vinegar)
  • 2 Tbsp dark rum , I used Vanilla Exctract
  • 2 Scotch bonnet peppers (or habaneros), with seeds, chopped, I used a whole red pepper
  • 1 red onion, chopped
  • 4 green onion tops, chopped
  • 1 Tbsp dried thyme or 2 Tbsp fresh thyme leaves, chopped
  • 2 Tbsp olive oil
  • 2 teaspoons salt
  • 2 teaspoons freshly ground black pepper
  • 4 teaspoons ground allspice
  • 4 teaspoons ground cinnamon
  • 4 teaspoons ground nutmeg
  • 4 teaspoons ground ginger
  • 2 teaspoons molasses, I only had Treacle at home and it seemed to have worked with it.
  • 1 (5 or 6 pound) roasting chicken, cut in half, lengthwise
  • 1/2 cup lime juice,
  • Salt and pepper
Place all the marinade ingredients in a food processor and pulse to a smooth paste.

Place the chicken in a freezer bag and cover with the marinade. Close it and shake it a little to make sure the marinade coats all the chicken. Leave in the bottom of the fridge overnight.

The King of the BBQ was once again on the job and made a great job of it. It tasted smokey and sweet. It was just delicious. Definitely a recipe that will be made and re- made this Summer.
I made this one with a mixed veggies and cashew nuts rice and grilled asparagus. 

Tuesday, 15 November 2011

Italian inspired dinner

Tonight we had Italian sausages for dinner. The weather was beautiful so my husband, who happens to be great at BBQ, decided to grill them on our charcoal BBQ... and did he do a great job!!!
I was in charge of the accompaniments: smashed potatoes with dried tomatoes and toasted pine nuts salad.


It was a pretty simple dinner but since I have decided to post more often I will be posting the simple, affordable food we regularly have at home. The other thing that motivated me to post this particular dinner was that for once in quite a long time, my little darling boy ate with not one word of protest and did not spill a bit of his food. So I guess that must have been good.

To make the smashed potatoes:
Preheat the oven to 200 DegreeC. Line a sheet pan with baking paper and lightly spray with oil.
Boil some water with salt or stock (none for us). Once it is boiling, add the potatoes (whole). Once fully cooked through (pierce it with a fork and when lifted up the potato should slide down the fork). Drain them and place them on your prepared sheet pan. Spray with a little more oil, sprinkle with herbs and salt (if using). Bake them in the oven until golden brown. They will be crunchy on the outside and mashed potato like on the inside.
I also made some caramelised onions just by pan frying one brown onion with a teaspoon of brown sugar and a splash of white vinegar. I added a little water to make sure they would reduce enough.
The sauce for the potatoes was just plain low fat yoghurt with green onions picked from my garden and a little sprinkle of salt (I knew my son didn't like that yoghurt so we indulged in a little salt).

I am sorry I cannot give the secret of delicious BBQd sausages as I do not know it myself and the expert is probably not ready to share it either.

Monday, 14 November 2011

Moroccan inspired Beef Meat balls

Last night we had a nice homemade Mexican inspired Chilli con Carne and I had a lot of beef mince left that I hadn't cooked. I prepared some meatballs with no specific seasoning so we could see what the inspiration of the day was. I just finely diced some 2 brown onions, 2 cloves of garlic, and some dried Mixed Herbs. I shaped them into balls and left them covered in the fridge overnight.

Tonight I made the dish.
Ingredients:
Tomatoes (I used 3 fresh ones)- and only if you want to make the sauce from scratch, otherwise half a tin of tomatoes in their juices will do the trick.
1 teaspoon of beef stock
1 cup of water (just boiled or hot)
Special blend of spices called "Arabic seven spices" which has: ginger, Mahlabi, black pepper, pimento, cassia, cloves, nutmeg, coriander and cardamon. (see note).
4 dried apricots, cut in smallish cubes
1 1/2 cup of cooked couscous (prepared according the instructions on the package or like I do, however you want as long as it taste good)
A handful of almonds and pine nuts

Before boiling the tomatoes, make a little cross incision at the bottom of each ones and prepared a cold bath (just water and ice cube) to submerge them straight after boiling to stop them from cooking too much.
Peel, process to a smooth sauce and pass them through a sieve before cooking the tomato sauce with a teaspoon of beef stock, a cup of water (boiled), the spices and the dried apricots.

Pan fry the meatballs, just to get them golden brown on the outside. Add the sauce and place in the oven for about 40 minutes to fully cook.

Cut (or smash) the almonds and mix them along with the pine nuts to the cooked couscous.

Once the meat is fully cooked serve with the couscous.

Note:
You will notice that I don't add any salt to my savoury recipes. On the advise of my midwife I cook everything with no added salt so my son can eat the same meals as we do. My husband and I just season to taste on our plates, although more times than not we don't add anymore. I try to get most of the flavor and seasoning from the Herbs and Spices I use.
The Arabic Seven Spice- to be quite honest the dominant flavor was the cinnamon. I have made similar dishes in the past and I only used Cinnamon, Ginger, Paprika, and Nutmeg. The combination of spices is really up to your taste, hence why I put the name of the recipe as Moroccan "inspired" beef meat balls. 
My son, who has decided to go on a special diet a few days ago (exclusively bread and cheese), cleared his plate (2 tablespoons of couscous and 4 meatballs). For a 16 months old I would say that is a good effort.

Hope you enjoy this recipe :) Please do not hesitate to send me the variations you have tried.

Friday, 11 November 2011

Potato crust quiche


While browsing the Net for ideas, I came across this blog: www.fortheloveofcooking.blogspot.com. There are some amazing recipes there. I hadn't defrosted anything for dinner tonight but I had fresh asparagus (they are delicious at the moment) and all the other ingredients for a nice quiche. At the same time, my son is going through a phase where he would only eat cheese and English muffins. I needed to get him to eat something else. So here is my version of Pam's potato crust quiche.

5 new potatoes (the ones I had were quite small) sliced thinly (I used my mandolin)
Homemade caramelized onions
1 fresh tomato
About 10 asparagus
1 ham steak (diced)
3 eggs
1 cup of milk ( I used Soy Milk)
1 cup of grated cheese (whatever you have in the fridge)
1 handful of Parmesan

Preheat the oven to about 200 Degree C. Spray of pan with oil and arrange the potato slices to cover the bottom and sides of the pan. Make sure they overlap.Bake for about 10 minutes. Take them out and set them aside.

Layer the onions, asparagus and ham. Mix the eggs and milk in a bowl and pour over the filling.

Mix the 2 cheeses (this way you will be sure to have an equal amount spread over the quiche). Scatter over the quiche.

Bake in the oven for about 40 minutes. Leave to cool.

Notes: I have made mine in my pie dish so you can't see the potato crust on the photos. Next time I will make it a Pirex dish and upload the pics.
We ate it warm and because there was fresh tomato in it, the filling was a bit watery. If you can wait until it cools down or even the next day it tastes absolutely perfect. We just had it for lunch and the flavours had infused very well.
We had ours with a salad of rocket, red capsicum and pine nuts and steamed asparagus. Yum!

Saturday, 27 August 2011

Brioche burger buns- updated

We were watching TV not long ago and on the show they were going on and on about those brioche burger buns and how good they were so I felt I needed to give them a try. I had a look around and I have found this recipe on www.smittenkitten.com

Light Brioche Burger Buns

Adapted from Comme Ça restaurant in Los Angeles, via the New York Times

I was asked to add some pictures. I have tried to take them step by step but at one stage of the recipe my hands were covered in dough which rendered the operation impossible. Hopefully you find the pics helpful. I have also added the end result: tonight's dinner- Beef Burger and Fries :)


Even the plate for the little one:


Makes 8 4 to 5-inch burger buns

3 tablespoons warm milk
2 teaspoons active dry yeast
2 1/2 tablespoons sugar
2 large eggs
3 cups bread flour
1/3 cup all-purpose flour
1 1/2 teaspoons salt
2 1/2 tablespoons unsalted butter, softened
Sesame seeds (optional)

1. In a glass measuring cup, combine one cup warm water, the milk, yeast and sugar. Let stand until foamy, about five minutes.


Meanwhile, beat one egg.


2. In a large bowl, whisk flours with salt.

Add butter and rub into flour between your fingers, making crumbs.
I had forgotten to take the butter out to let is soften. It is something I almost always forget to do but Thanks to Nigella Lawson I have the trick: grate it:

Check out that yeast mixture!!!

Using a dough scraper, stir in yeast mixture and beaten egg until a dough forms.


Scrape dough onto clean, well-floured counter and knead, scooping dough up, slapping it on counter and turning it, until smooth and elastic, 8 to 10 minutes. The dough will be on the sticky side so it can be a bit messy, but keep in mind that the more flour you knead in, the tougher the buns will get. Try to leave them tackier than you would a round loaf.


It was very messy but I tried my best to not add too much flour which in the end paid off.

3. Shape dough into a ball and return it to bowl. Cover bowl with plastic wrap and let rise in a warm place until doubled in bulk, one to two hours.


4. Line a baking sheet with parchment paper. Using dough scraper, divide dough into 8 equal parts. Gently roll each into a ball and arrange two to three inches apart on baking sheet. Cover loosely with a piece of plastic wrap lightly coated in nonstick spray and let buns rise in a warm place for one to two hours.


5. Set a large shallow pan of water on oven floor (I have found that it's best not to do that but I guess it depends on the oven). Preheat oven to 200 degrees Celcius with rack in center. Beat remaining egg with one tablespoon water and brush some on top of buns.


Sprinkle with sesame seeds, if using. Bake, turning sheet halfway through baking, until tops are golden brown, about 15 minutes. Transfer to a rack to cool completely..


I have to admit that when I had a look at the recipe I though: "that looks like too much work". But we had a friend coming over for lunch and it motivated me to make them. So I did and they turned out to be great (if i can say so myself). They turned out to be light and according to my husband the same consistency as Kaiser rolls and very tasty. I actually didn't take any picture of the buns so well I guess I have to make some more. The ones we have made on Saturday were chicken ones but tonight we went for beef. We had: homemade beef patties, lettuce, beetroot, caramelized onions, avocado and homemade tomato relish (my husband's secret recipe).